Showing posts with label fun. Show all posts

Tuesday, July 31, 2012

Time with a good friend ...

It's strange after you leave school, you're starting a new life really and all the school socialising from past years come to a close. This is all good of course, it's life and it's getting out there in the real world and living your life but sometimes it's a little lonely ... I mean I have plenty of people to talk to and there's my family and my wonderful boyfriend but occasionally you really miss the friendship groups of your school friends.


Whenever I get the opportunity to catch up with someone from school I do, it's good for me because it's someone different to be with and have a laugh with. We may not all get to hang out as much any more or do things as a team but we are still in each other's life to a certain degree.

Last week I got to spend the day with my best friend Juanita, we do this every so often, get all glammed up and head off to take pictures of each other, so much fun!!! :)  This time was extra special because she's just had her braces taken off and looks amazing (she always has), she also allowed me to do her makeup for my portfolio (practice makes perfect) and best of all we had such a great time together.

We headed off to one of the local beaches in the area and posed and strutted for the camera, haha :D we even grabbed a ladder from her dad's shed and used it as a prop ... did we get some strange looks? You bet we did haha, but we didn't care, as long as we were having fun.

The theme of one of the photos was like opposites, we each wore the same dress from Romwe.com, Juanita in the black version and myself in the pale pink. The contrast with her blonde hair and my dark hair worked great and we were very pleased with the photos.


The weather was absolutely perfect, we have the best winters in the world here in Queensland, I mean look at that water!! :) and the day was perfect.

Remember to make time for good friends because they are a wonderful refreshing change to everyday life :D

Saturday, February 11, 2012

Valentines Picnic in the Park - on a budget

This is the first year I have been in a relationship at Valentine's Day and I am super excited about it :) However, over the years my friends and I have always been each other's Valentines in a fun way and I didn't want to loose this tradition, so I decided to hold a little picnic in the park for us girls to enjoy :)


If you're looking for something to do this Valentines and are not sure what, why not have a picnic with your friends!! If you live in a cold climate and you can’t get outside, make it a tea party instead :) Throw some quilts on the floor and set the table just like on a picnic :)

It doesn’t take much to put something like this together, all you need is a handful of friends, some fun food and a bit of creativity.

Theme

Haha, well the theme of course was 'Valentines' but I wanted a bit of a mix for my look, it was to be pretty but not ‘old’ pretty, more a fun thrown together kind of look.  I went off to the Op-Shop/Thrift Shop and found some napkins, a bed sheet, an odd cushion and some flowers.

What I used

Lemon coloured bed sheet – thrifted $3.50
Pink and Lemon coloured napkins (damask) - .20c each x 8 - $1.60
Cushion - $2.00 plus some I already had
Blue Glass Water Bottle - $1.99 – Woolworths
Assorted china and glass plates – mum’s
Red check fabric – mum’s
Tablecloth – mum’s
Green Plastic plates for food – Woolworths $1.99
Glass bowls for food – mum’s
Flowers (artificial) – thrifted - $3.50
Lanterns (birthday gift) – hung by wrapping twine – already had
Throw quilts – mum’s
Bubble blowers - $1.00 each x 2 - $2.00 plus some I already had from my 18th
Old picnic basket – mum’s
Old net curtain – mum’s


Food

I asked everyone to bring something ‘pretty’ to eat (no chip bags, hahahaha)
I bought watermelon
Mini Macaroons
Cupcakes
Mini Marshmellows
Bottled drinks

Invites

I invited my friends over Facebook because it was really short notice, a nicer way would be to email designed invites or actually send paper ones!!!! :O haha

Location


We went to a local Park and found a ‘cabana’ over the water, the centre was covered so that if it rained we would be pretty safe. I threw quilts on the ground and some cushions and laid fabric etc on the wooden benches to use like a table. I hung lanterns in one opening of the cabana and the curtain in another opening. Fake flowers were thrown in various places and a scarf hung near the food to add a bit of interest.

*******************


The picnic started around 10.00am and went for a couple of hours and it was a really nice way to spend time with my friends and a great way to celebrate Valentines Day. We had it a few days before Valentines so that those with partners could still have the actual ‘day’ with them.

The picnic was fun to do and everyone seemed to enjoy it :)

I hope you enjoyed this quick post and that it inspires you to do something with your friends :)


Tuesday, February 7, 2012

K-Gravel Texture Clay - Review

O&M K-Gravel Texture Clay
Photo property of AdoreBeauty

So my boyfriend was playing around with the idea of getting ‘dreads’ for something a little different and I suggested that I give him some ‘fake dreads’ first so he can get an idea of what they might look like :)

I've had the 'K-Gravel Texture Clay' for a few weeks now and have been wanting to try it on someone, my brothers both had their hair cut so my plans for them went out the window!! hahaha :/ So when Tom mentioned the dreadlocks to me I thought I could use the Clay.

I asked him to come walking with 'not so clean hair' and I set about styling his locks. I got about a finger nail amount in my palm and warmed it up so it was easier to work with, I then gathered up small sections of hair (around 2cm) at a time and worked the clay into it. I then twisted the hair from the scalp to the ends and then lightly teased it upwards to give it that ‘dreadie’ look ....... and it didn't work :( hahahha :D

I found the Texture Clay did not work well for this look, yes wax would do the job much better, I'm not sure if it was because of his hair being too short or it's just not 'that' sort of styling clay hahahaha however, I did set about styling it for him in a different way, I found it gave body and texture to his hair and did what it was 'meant' to do.

Please be aware that I am not a hairdresser and have never really had any experience styling boys hair hehehe :P So this is the front of his head and yes I think I may have used a bit too much product but that was from trying to do the dreadies earlier!!! hahaha


The clay is a good styler and does hold to the hair well with the inclusion of ‘pumice’ and it is easy to wash out at the end of the day (or rinse in the park heheheh :P). The smell is noticeable but not offensive. 

You can purchase this product in two sizes, either 25g for $12.95 or 100g for $31.95 from ‘adorebeauty.com’, it may also be available from selected hair salons in Australia.

I have a video on fake dreads on my own hair using different products that you can see HERE if you're interested.

Sunday, February 27, 2011

Rihanna in Concert!!

AHH!!! My life is complete!!
I was invited to go to the Rihanna Concert ‘Last Girl on Earth’ on Friday night by a friend, of course I was ecstatic :D There were four of us that went, driven there by her wonderful Aunty who was a blast to talk to. Anyway ..... this being my very first ‘real’ concert I was beside myself with excitement (being the uncool person that I am ha ha ha) my buddy was just as excited as I was so that made the evening even more fun.
We jumped and we screamed and generally had the time of our lives making idiots of ourselves but we didn’t care, how often were we going to get to see the one and only ‘Rihanna’, I mean ...

So we made ourselves busy before the concert taking lots of photos just in case we got ONE good one, hee hee you know how it is J and I kept my ticket stubb of course and collected some pink confetti from the show, does it get any better !!
I’m so glad I got to go, we had a wonderful time there and it was well worth the late night because yes, I had to get up and go to work the next day.
SO A FEW TIPS ON ATTENDING CONCERTS:
Dress to suit the concert but dress so that you are comfortable. If you are
in a seat you can wear heals no problems and a dress if the occasion fits.

If you are up the front jumping around, I recommend that you wear flat comfy shoes and maybe jeans or similar.
Concerts get really hot even when you aren’t jumping around so don’t overdress, I ended up putting my hair up because it got too hot for me so keep this in mind.
Go with like minded people so that you can all have a great time, it’s no fun if you’re the only one jumping around! Be sure to enjoy yourself.
Try not to all wear the same thing, it was soooooooo funny when we got ready, we had all bought with us jeans and white tops :/ luckily the girl who’s house we were at could get changed just to mix things up a bit.
You can ‘overdo’ the make up at a concert, go for a more dramatic look than you would usually go for, the lights at these things are really harsh and can wash you out.

Make it a great memory!!

Tuesday, February 8, 2011

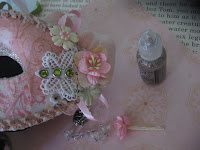
Making a Mask - Fantasy Valentine


I was invited to a Masquerade Party last week, it was short notice so I decided to make a mask (with some help from my mumma) and go as a Flower, ha ha.


Directions:

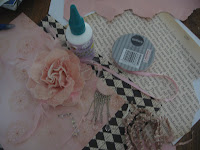
1. Firstly buy a cheap papier mache mask from a $1/2 store and find some pretty papers that you want to rip up and cover the mask in, just use a regular craft glue for this.
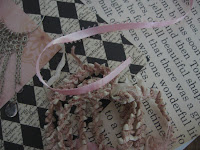
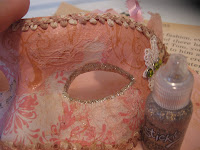
2. Once this is done and dry, trim excess paper away from edges and fold small amount to the back, making small cuts all the way around to help keep things smooth, remember to do around the eyes as well. Coat the mask with a layer of glue to give it a 'softened' look and let it dry. Find a pretty braid or ribbon and glue around the mask leaving some hanging down on the side where you want the main decoration to be and then add some nice large looped ribbons here for interest.
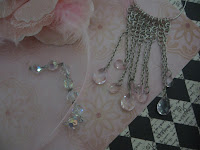
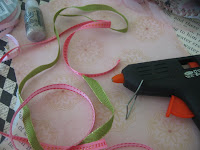
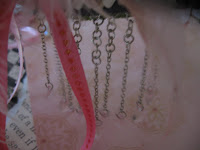
3. Find some pretty decorations, I used ribbon, an old broken flower that was stuck to my door, an odd earing with dangly bits, some braid just look around for odd bits and pieces (ask friends who may have some too, broken jewelry works well).
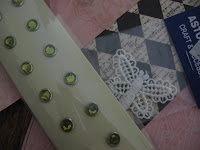
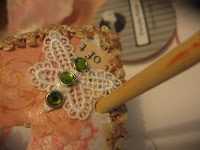
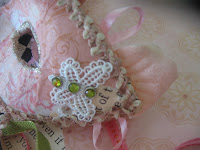
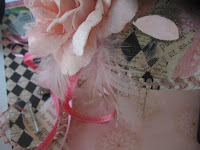
4. My mum has lots of craft supplies so I raided her stash for a crochet butterfly and some sparkly bits, hehe :) These were glued to the side for the smaller decorations, along with some ribbon which I looped and some of the larger petals from the flower which I glued underneath the mask (peeking out). Be sure to poke through the hole for the elastic too.
5. I then went around the outside of the eyes with a lovely vintage gold glitter glue and added some more ribbons to the side of the mask where the larger flower was glued. I broke the earing up and attached it to a stip of ribbon and then glued along the bottom of the mask on one side with a hot glue gun.
6. Some smaller flowers were then added to the other side to balance the mask out and a bit more glitter glue lightly placed on the large petals. I layered 2 or 3 small flowers to give more dimension and interest.

*******

There are so many things you can do to a mask, remember to make sure you can see through the eyeholes properly before decorating your mask because some masks have eyes that are set wide apart and you can't see properly. If this happens you may have to cut the inner corner of the eyeholes a bit more for a better fit, yes, I had to do this myself when I was half way through so we live and learn :) .... hahahaha

Hope you find this helpful

LinkWithin

Related Posts Plugin for WordPress, Blogger...